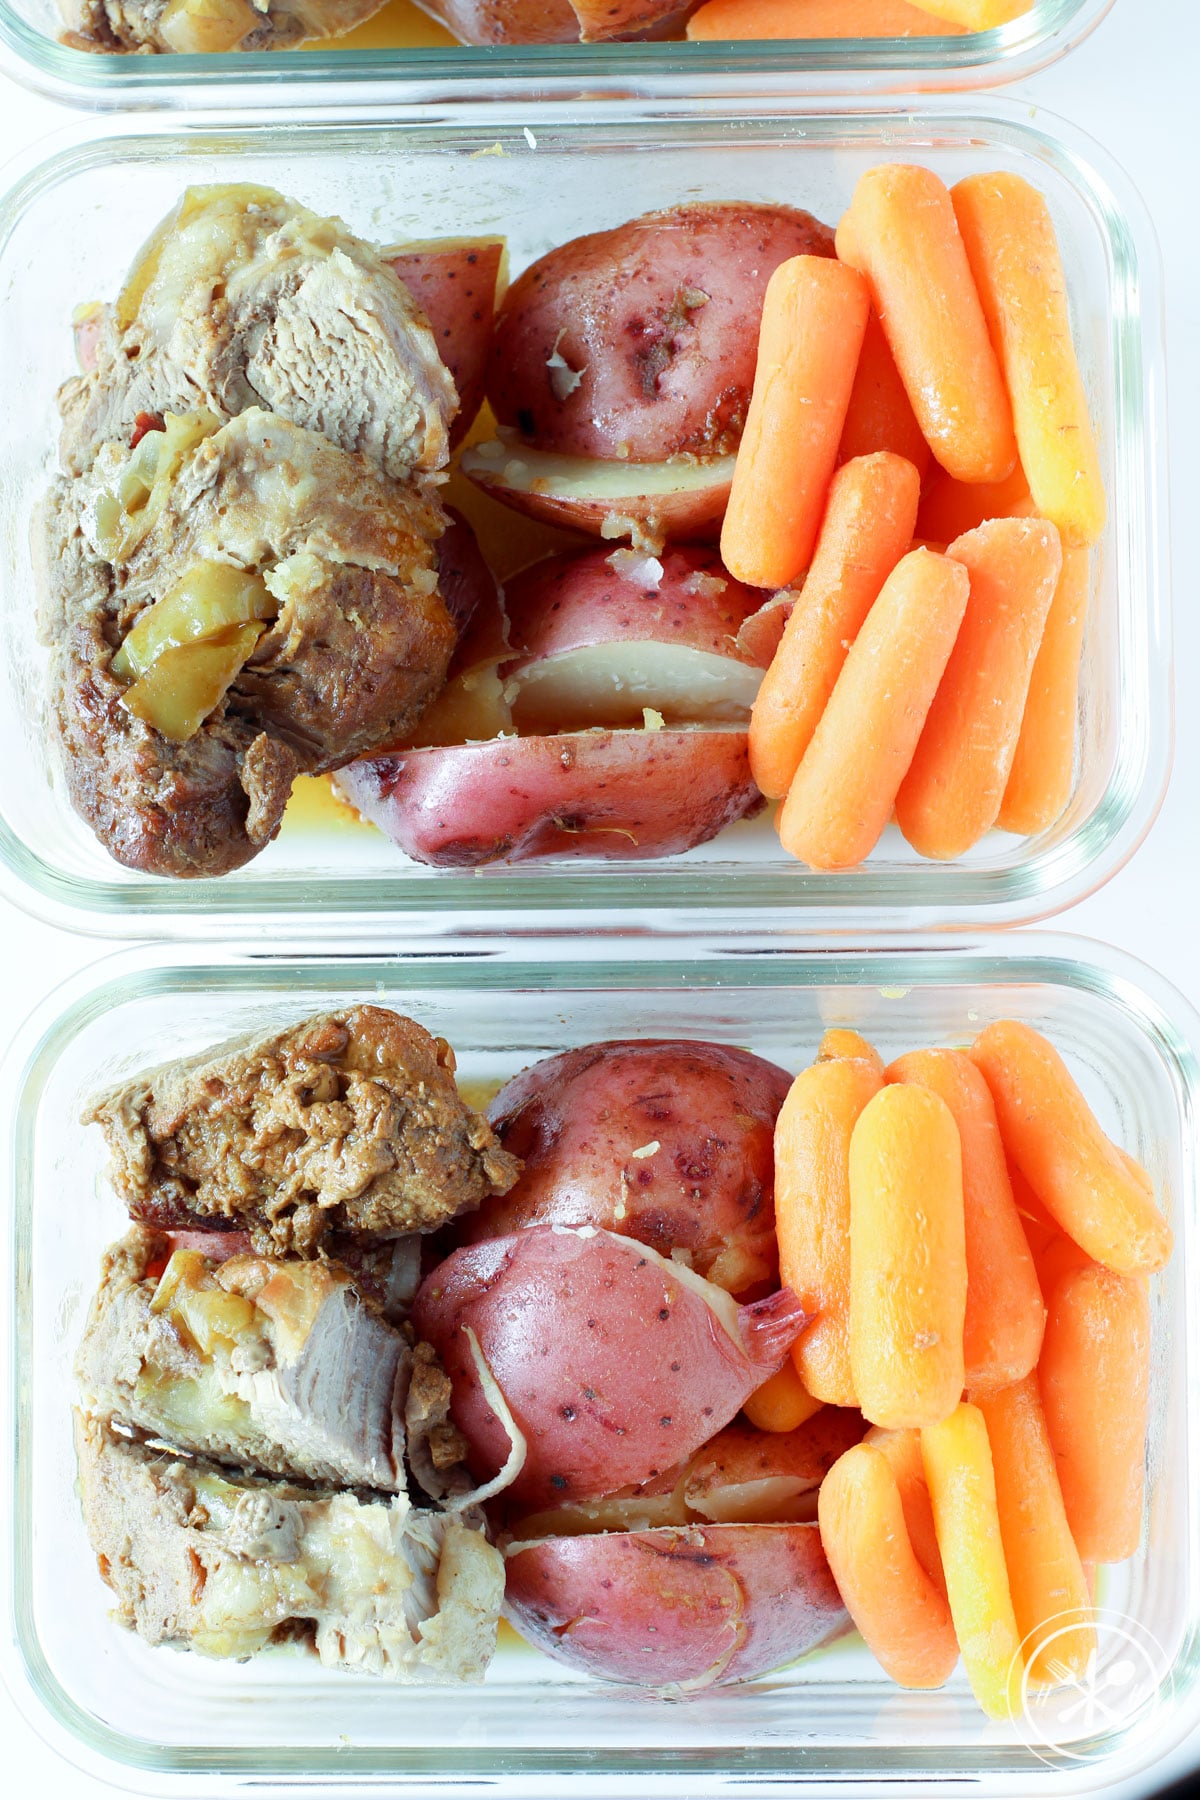
Meal Prep Maple Mustard Instant Pot Pork Tenderloin with red potatoes and baby carrots is a healthy meal prepared all in one pot with very little fuss. 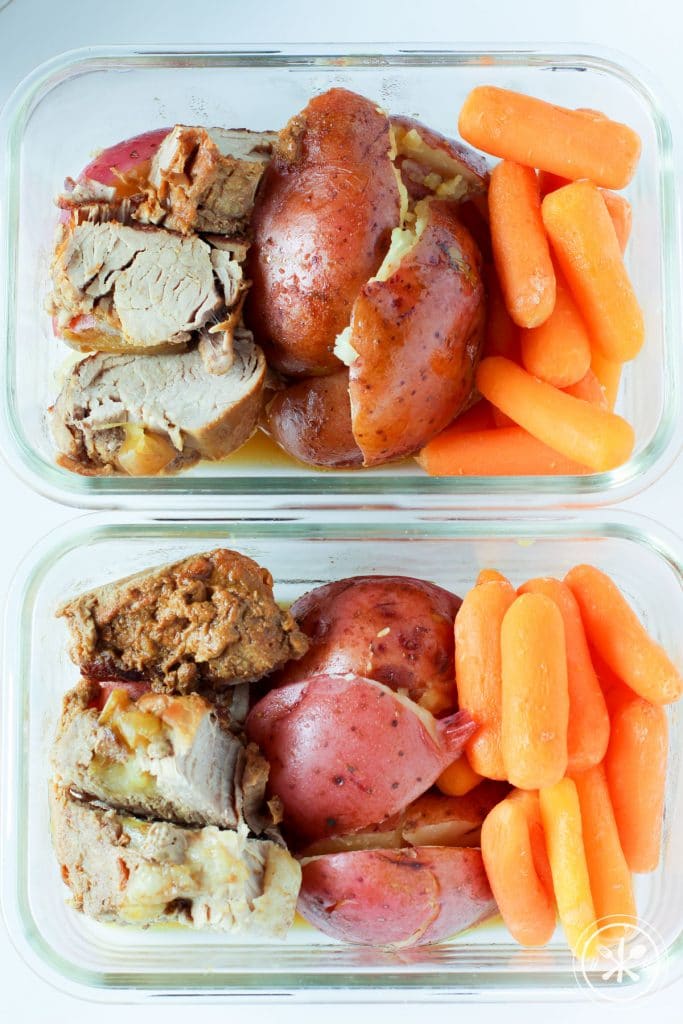
So many things to say on this Happy Monday! We had a great weekend that included running, the dog park, a new workout that I loved, time with family which included the BEST EVER homemade refried beans (aka the only way I'll eat beans). Today, though, is about this delicious pork tenderloin.
First, I have a confession. I've confessed it before, I don't love most food that comes from the [easyazon_link identifier="B01NBKTPTS" locale="US" tag="hunghobb07-20"]instant pot[/easyazon_link] or[easyazon_link identifier="B0012US88I" locale="US" tag="hunghobb07-20"]slow cooker[/easyazon_link]. I would much prefer a juicy, grilled piece of meat over a moist, slow-cooked version any day.
Mr. Hungry, however, LOVES just about ANYTHING made in the slow cooker or instant pot, like LOVES IT. He would much prefer that over grilled meat any day.
There are many, many, many weeks I meal prep his lunches in the Instant Pot, although most times I don't share it because it looks like slop. PLUS I'm going so fast trying to get our meal prep done in under an hour or two that I don't want to stop and take pictures.
That being said, I know the meals I make on the fly, the fast ones that go into Mr. Hungry's [easyazon_link identifier="B01MS1L2ND" locale="US" tag="hunghobb07-20"]meal prep containers[/easyazon_link] are probably the ones you want to be making too.
So I'm trying to get better at snapping photos while I make them and some after photos. This is from a few weeks ago, I used my one pan maple mustard pork chop recipe for inspiration and basically threw everything in the Instant Pot to let it do the work!
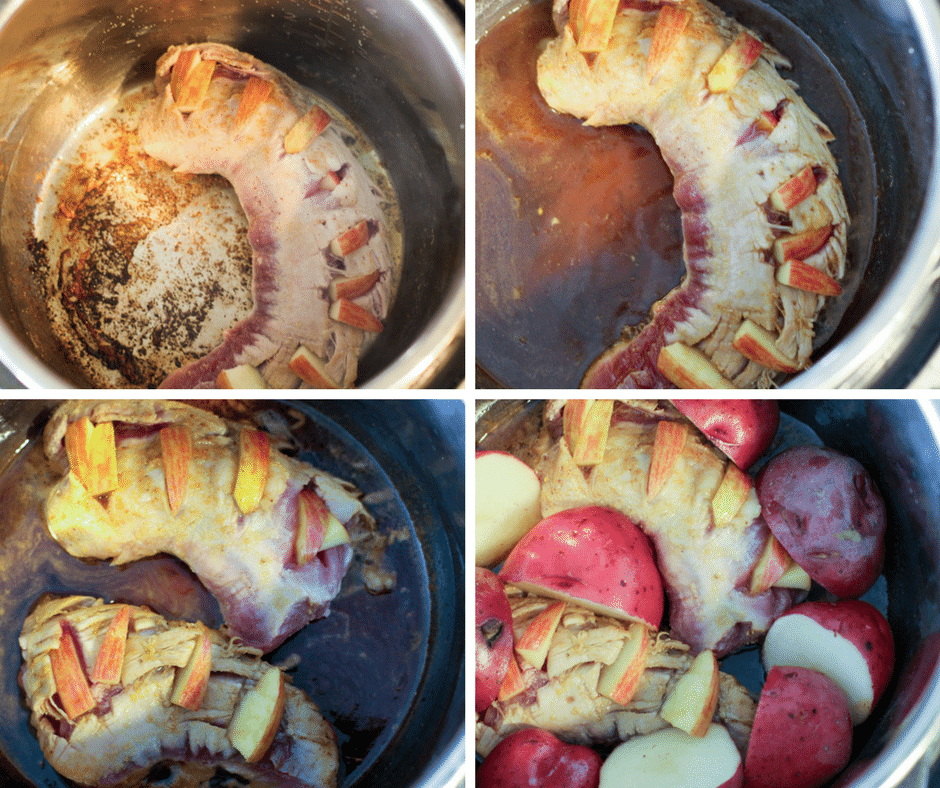
One of the best things about the Instant Pot is the ability to sear the meat so it gets caramelized before you cook it. (In case you missed it see my Instant Pot review here.) After that was done I poured the sauce in and added all the veggies, some to the bottom with the pork and some in the steamer basket.
I thought the carrots might get overcooked but Mr. Hungry said they were perfect. (To me cooked carrots are overcooked no matter how you cook them, I like mine raw. But again, if you are like Mr. Hungry you will LOVE these like he did!)
Below the steamer basket, the meat was nice and tender and the potatoes were perfect. Once I was done with photos I divided the meat, potatoes, and carrots between four meal prep containers.
I then spooned the extra liquid over each meal before closing them up and sticking them in the fridge! To me, it's not the prettiest meal ever but Mr. Hungry asks for this lunch on the regular so I'll take that as a win.
The second and third time I made this recipe I doubled the pork because it cooks down a little bit. I also left out the potatoes and doubled the carrots since Mr. Hungry is still recovering from his hernia surgery and isn't super active he doesn't want/need as much starch in his life.
Let me know if you get a chance to try this recipe!
[clickToTweet tweet="Meal Prep Maple Mustard Instant Pot Pork Tenderloin with red potatoes and baby carrots is a healthy meal prepared all in one pot with very little fuss. #paleo #glutenfree #dairyfree " quote="Meal Prep Maple Mustard Instant Pot Pork Tenderloin with red potatoes and baby carrots is a healthy meal prepared all in one pot with very little fuss. #paleo #glutenfree #dairyfree "]
Let's talk ingredients really fast:
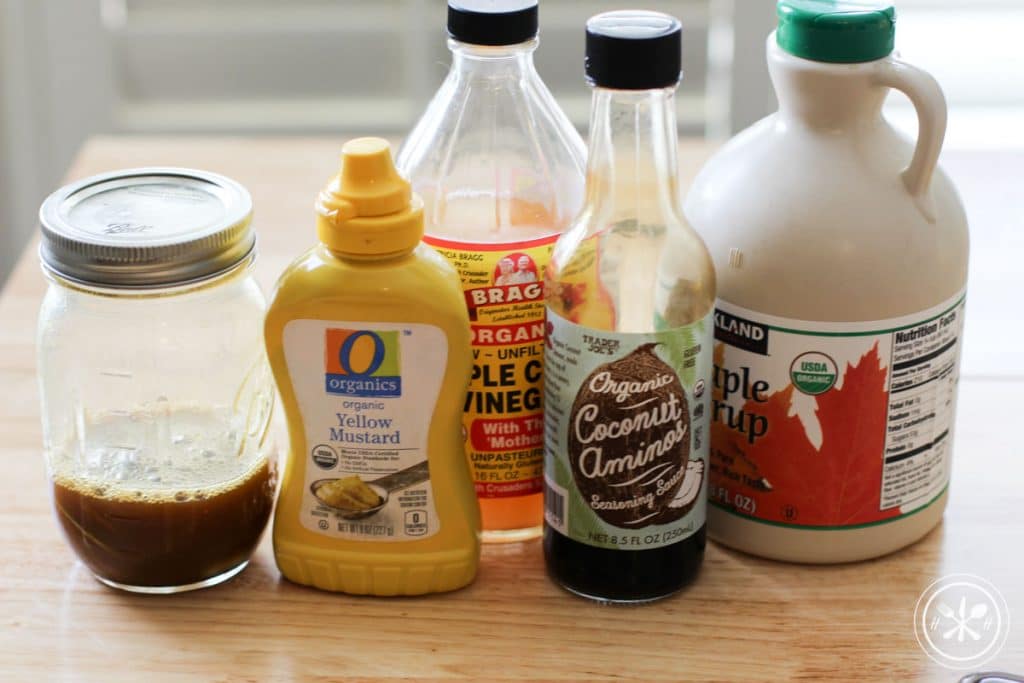
Maple Syrup - You could probably sub another sweetener here in a pinch like honey or agave nectar. However, I haven't tried it. If you use honey, make sure it's liquidity enough to sub for the same consistency as maple syrup.
Mustard - I used yellow mustard, you can use another type if you prefer such as Dijon.
Apple Cider Vinegar- Personally, ACV is my favorite type of vinegar to cook with and rarely sub it out. The apple taste in parts a slightly fruity tast that no other vinegar has. If I had to sub this with something red wine vinegar might pair nicely with the maple syrup.
Coconut Aminos - we use coconut aminos because they are gluten and soy free, but you can use soy sauce, they taste pretty similar.
Avocado oil - okay to sub other types of oil here that hold up to high heat. (See are you using the right cooking oil?)
Pork Tenderloin - I get all my meat from Butcher Box, here is a post I wrote about it. You could probably sub other types of white meat tenderloins such as turkey. I would not sub a beef tenderloin it will taste funky with this sauce!
Red potatoes - as long as they are cut small enough you can use any type of potato you want.
Baby carrots - if you are not a fan of cooked carrots like me, you could sub any vegetable that doesn't steam super fast like beets, asparagus, thicker green beans, etc.
Apple - I used a gala apple, but you can use whatever you want except green apple which would be too sour.
Maple Mustard Instant Pot Pork
Ingredients
Honey Mustard Sauce Ingredients
- ½ cup maple syrup
- 2 T mustard
- 4 T apple cider vinegar
- ¼ cup coconut aminos or soy sauce
Ingredients:
- 1 tablespoon avocado oil
- 1 lb pork tenderloin
- 1 lb red potatoes washed and cut in half
- 1 lb baby carrots
- ¼ apple cut into thin slices
Instructions
- Mix all ingredients for sauce in a mason jar or small bowl. (I like to use a mason jar and whisk ball to shake up the ingredients.)
- Turn Instant Pot onto the sauté function, add your avocado oil and brown one side of the pork tenderloin.
- Once one side is browned flip it over, now cut slits in the top and stick apple slices into it. (I did this while it was in the IP, but you can take it out cut the slits, add the apples then return it to the pan if you want.) Once both sides are lightly browned, turn the IP OFF. At this point, I ended up cutting my pork tenderloin in half, but you don’t have too.
- Pour the sauce over the pork tenderloin. Add the potatoes to the bottom of the instant pot, as much as you can fit in only one layer.
- Place the steamer basket (I have this one) on top of the pork and potatoes. Add carrots and remaining potatoes. Make sure that the vegetables don’t rise above the max fill line.
- Cover, switch nob to sealing, and select the manual setting, then choose high pressure. Set the time to 10 minutes. Natural release for 10 minutes.
Notes
Nutrition
PSST Want to make healthy eating easier and more convenient than ever? I recently launched WTE? Meal Plans that include new healthy recipes every week, like this easy meal prep recipe! Easy scheduling, auto-generated shopping list based on your schedule, and Registered Dietitian approved! Check it out!
Related Posts:
What I Want You To Know About the Instant Pot (plus recipe roundup)
Pin it for later and follow @hungryhobby on Pinterest to see what healthy Instant Pot recipes I'm pinning!





Megan @ Skinny Fitalicious says
Making IP chicken today!
Kelli Shallal MPH RD says
Yummm yummy saw it on your IG stories!
Karly Foret says
This looks delicious!!
Kelli Shallal MPH RD says
Thanks!
Emily @ Pizza & Pull-Ups says
The would absolutely love this! I will have to give this a try soon.
Kelli Shallal MPH RD says
Let me know how it goes!
CandyC says
Made this tonight, excellent! Thank you!
Kelli Shallal MPH RD says
Glad you enjoyed it!
Rina says
I am confused. Do you hi cook for 10 minutes or 24 minutes? I am using a 2 lb. tenderloin so do I cook it longer. Sounds like a yummy recipe.
Kelli Shallal MPH RD says
Hi Rina! You will set your IP to cook on high for 10 minutes. It will first come to pressure, then cook your food for 10 minutes. After 10 minutes of cooking on high pressure it will automatically switch to warm mode, just leave it alone for 10 more minutes (this is called Natural Release because the IP is losing pressure slowly but because some pressure remains the food will still be cooking). You can then quick release the pressure and your meat should be done. Make sure you read your IP manual front to back because it explains a lot of the terminology you will find in IP recipes such as natural release, quick release, etc. It's confusing at first but keep your manual handy for reference in the kitchen and you will get the hang of it! I still keep my manual in a drawer in the kitchen and reference it from time to time.
Kelli Shallal MPH RD says
Hi Rina, just saw the second part of your post! Yes, I would bump up your pressure cooking time +5 minutes and your natural release time +5 minutes, that should do the trick but I haven't tried it so I'm not 100% sure. Worse case if your meat isn't cooked all the way when you quick release just start over with an additional 5-10 minutes pressure cooking time, then quick release! Again, make sure to read and follow all safety instructions in the manual!
Elicia says
Im new to IP cooking and was wondering why do you use the steamer basket instead of just putting everything in together?
Kelli Shallal MPH RD says
Hi! Just to improve the texture, if you put it all together the potatoes and carrots would boil and potentially become mushier.
Jess says
What if mine doesn't have a steamer basket?
Kelli Shallal MPH RD says
I had to order it separately, it was less than 10 bucks when I ordered mine. I think you could probably just dump the carrots on top but I haven't tried that.
Jess says
What if I have no steamer basket?
steph says
I make this recipe probably once a month for some pretty picky eaters. We still eat rice, so I often pair with rice and a green veg. Everytime, the picky teenager says, “I don’t know what you did to this meat, but it’s hella good.” And my partner loves it because it tastes a little like teriyaki. : D
Thanks for posting this win-win-win!
Kelli Shallal MPH RD says
OMG LOVE THIS! Thanks for sharing, made my night!