Good morning friends! Thanks for bearing with me while the blog goes through some changes on the back end. I know some sharing buttons and things like that might not be working 100%, it should all get sorted out soon!
In the meantime, I have another recipe for appetizer week for you guys! One that Mr. Hungry has been begging me to make a homemade version for years! Have you ever read the ingredients on a box of mini quiches at Costco, it's some scary stuff.
Not only do they have refined white flour that we don't usually eat in our house, but they also have hydrogenated oil aka trans fat. Combined with the massive amounts of preservatives to keep them frozen, it's kind of a three strikes your out deal. Partially hydrogenated anything is an absolute no in my house. It raises your cholesterol, makes your cholesterol more dangerous, and promotes inflammation.
So finally, I decided to try and make some for Mr. Hungry. It took a few batches to get it right though. The first time I made them I burnt the you know what out of them, they tasted good but were dry and burnt. The second time they were too wet and stuck to the pan.
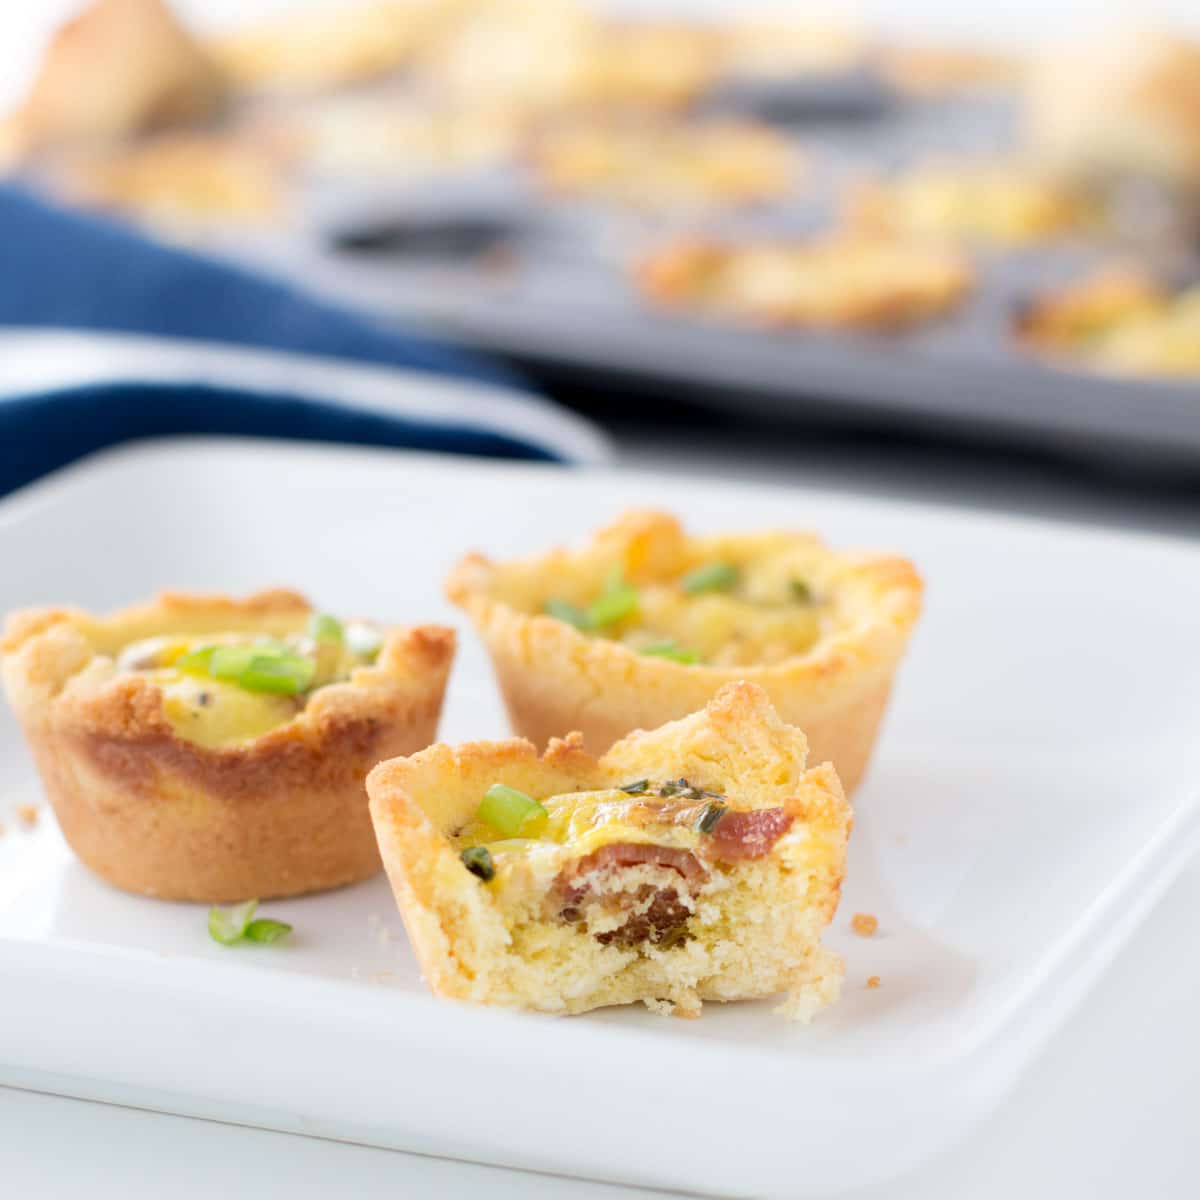
After a few attempts though, I finally got them perfect. Light and flaky crust with a savory bacon or cheesy filling, utter perfection. Now, I'll be 100% honest.
This recipe isn't the quickest recipe I've ever made in my life. I was annoyed with myself while I pressed the crust into 24 mini tin holes. In reality, it took less than five minutes and it was 100% worth it because this version is so much healthier!
Coconut flour adds, fiber and protein that you wouldn't get with refined flour. (PS would anyone be interested in focuses on different types of flours? I know many of you are still unsure what to do with it but are interested. I'm happy to share the rundown on each one of my favorite flours if you want!) Let me know if you give them a try!
Mini Quiches
[clickToTweet tweet="These mini quiches are super easy to whip up with a #grainfree crust! the best finger food!" quote="These mini quiches are super easy to whip up with a #grainfree crust! the best finger food!"]
Mini Quiches
Ingredients
Crust
- 1 cup coconut flour
- ⅓ cup melted butter
- ⅓ cup vanilla unsweetened almond milk or original
- ¼ teaspoon salt
- 2 eggs
Instructions
- Preheat oven to 350F.
- Make crust by combing 1 cup coconut flour, ⅓ cup melted butter, ⅓ cup almond milk, ¼ teaspoon salt and 2 eggs until mixed.
- Grease a mini muffin tin and add 1-2 tablespoons of dough in each muffin hole. Press down to make the mini quiche crust, repeat for all 24 holes. You don’t want it to be more than ¼ inch thick.
- For bacon and chive quiches: add a sprinkle of chives and a pinch of crumbled bacon to each hole. Note if you want all bacon and chive then you need four pieces of bacon and more chives.
- For 3 cheese version: Add a sprinkle of chives to each hole. I just added a couple of shreds of each kind of cheese (I used Swiss, cheddar, and Colby) into each of the remaining 12 holes. Note, if you want all vegetarian you need more cheese and chives.
- Whisk together half and half, eggs, garlic, and remaining salt. Fill each crust with 1 ish tablespoon of filling. You want them to be full but not overflowing.
- Bake at 350F for 25 minutes until filling is set and the crust is golden brown.
Nutrition
More appetizer recipes or check out my appetizer recipe index:


Megan @ Skinny Fitalicious says
YUM! Will you pls deliver these to my house for Christmas?
Kelli Shallal MPH RD says
Can you believe they are already gone? Family devoured those!
Sarah @ Bucket List Tummy says
Love this idea! These mini quiches are too cute.
Kelli Shallal MPH RD says
Thanks girl! I would if my family didn't eat them all! ha ha
Emily @ Pizza & Pull-Ups says
Yum! I eyeball those mini quiches at Costco all the time but always wondered what all was in them, thanks for cleaning them up, this sounds awesome!
Stephanie Grace Pepper says
I realize this was posted years ago so I've no idea if you will even see this comment.
I am in the process of making this recipe in hopes it will be a go for a ladies tea party I am hosting soon.
I just have a question about the crust. Is it not baked a bit before the egg mixture is added?
I will just go ahead with the recipe as is but usually with these types of things the crust is browned abit head of adding the mixture.
Kelli Shallal MPH RD says
I really need to remake these with process shots! I haven't made them in a couple of years, but as I recall, no you don't need to bake them first! The crust cooks pretty quick so it all works well in the mini pan. I hope they come out good and you enjoy!