So, last summer I spent a small fortune on cold brew coffee either from the grocery store or coffee shops. I would be scared to go back and look at how much I spent, but I can estimate. 4 dollars times 90 days = $360 dollars! This summer, I was forced to look for a different option.

Alos, cold brew isn't available in decaf or half-caf. Because I want and need to be in control of my caffeine intake I decided I'd finally try out a cold brew pitcher. From the very first day, I tried all I could think was "why haven't I been doing this all along?"
(BTW this post isn't sponsored, I just love this purchase and want to share it with you guys!)
So I chose the [easyazon_link identifier="B00FFLY64U" locale="US" tag="hunghobb07-20"]Takeya Cold Brew Pitcher[/easyazon_link] because I have one of their water bottles and it's like my favorite water bottle ever!
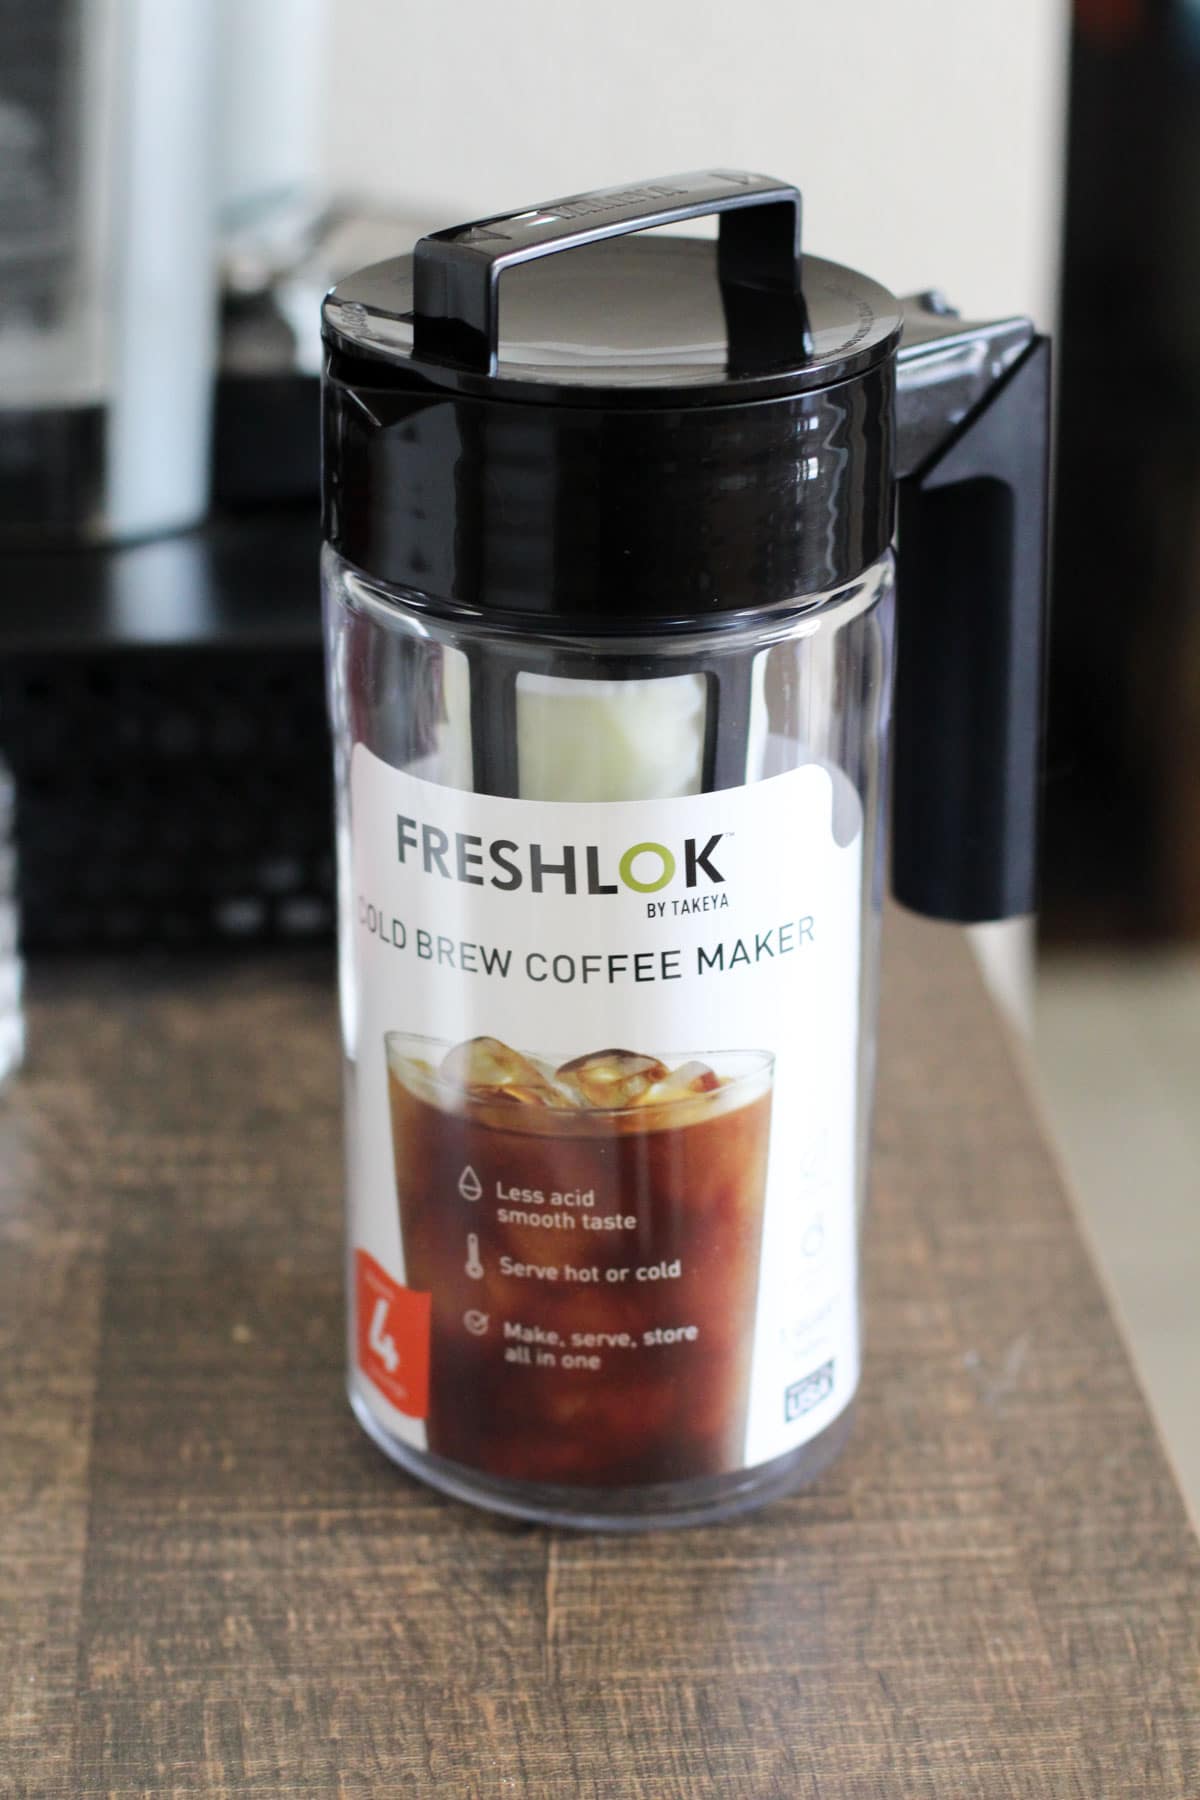
Okay, so the purpose of this post is to show you EXACTLY how easy it is to make iced coffee at home with one of these pitchers. I still can't get over how easy it is, and how much better it tastes than the way I was doing it before.
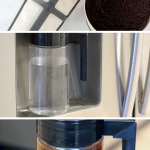
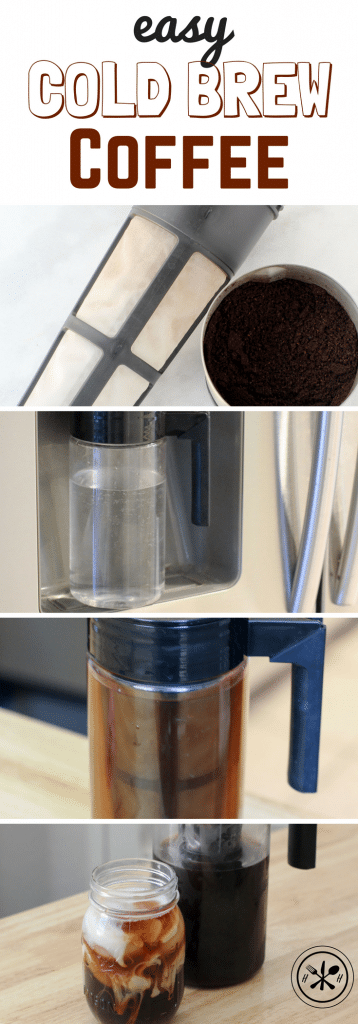
The lid attaches to a filter that screws into the bottom portion of the lid. You fill it with whatever kind of coffee you want, but I suggest a super dark roast since you are brewing a cold brew concentrate. You will add ice and more water/milk to the finished product.
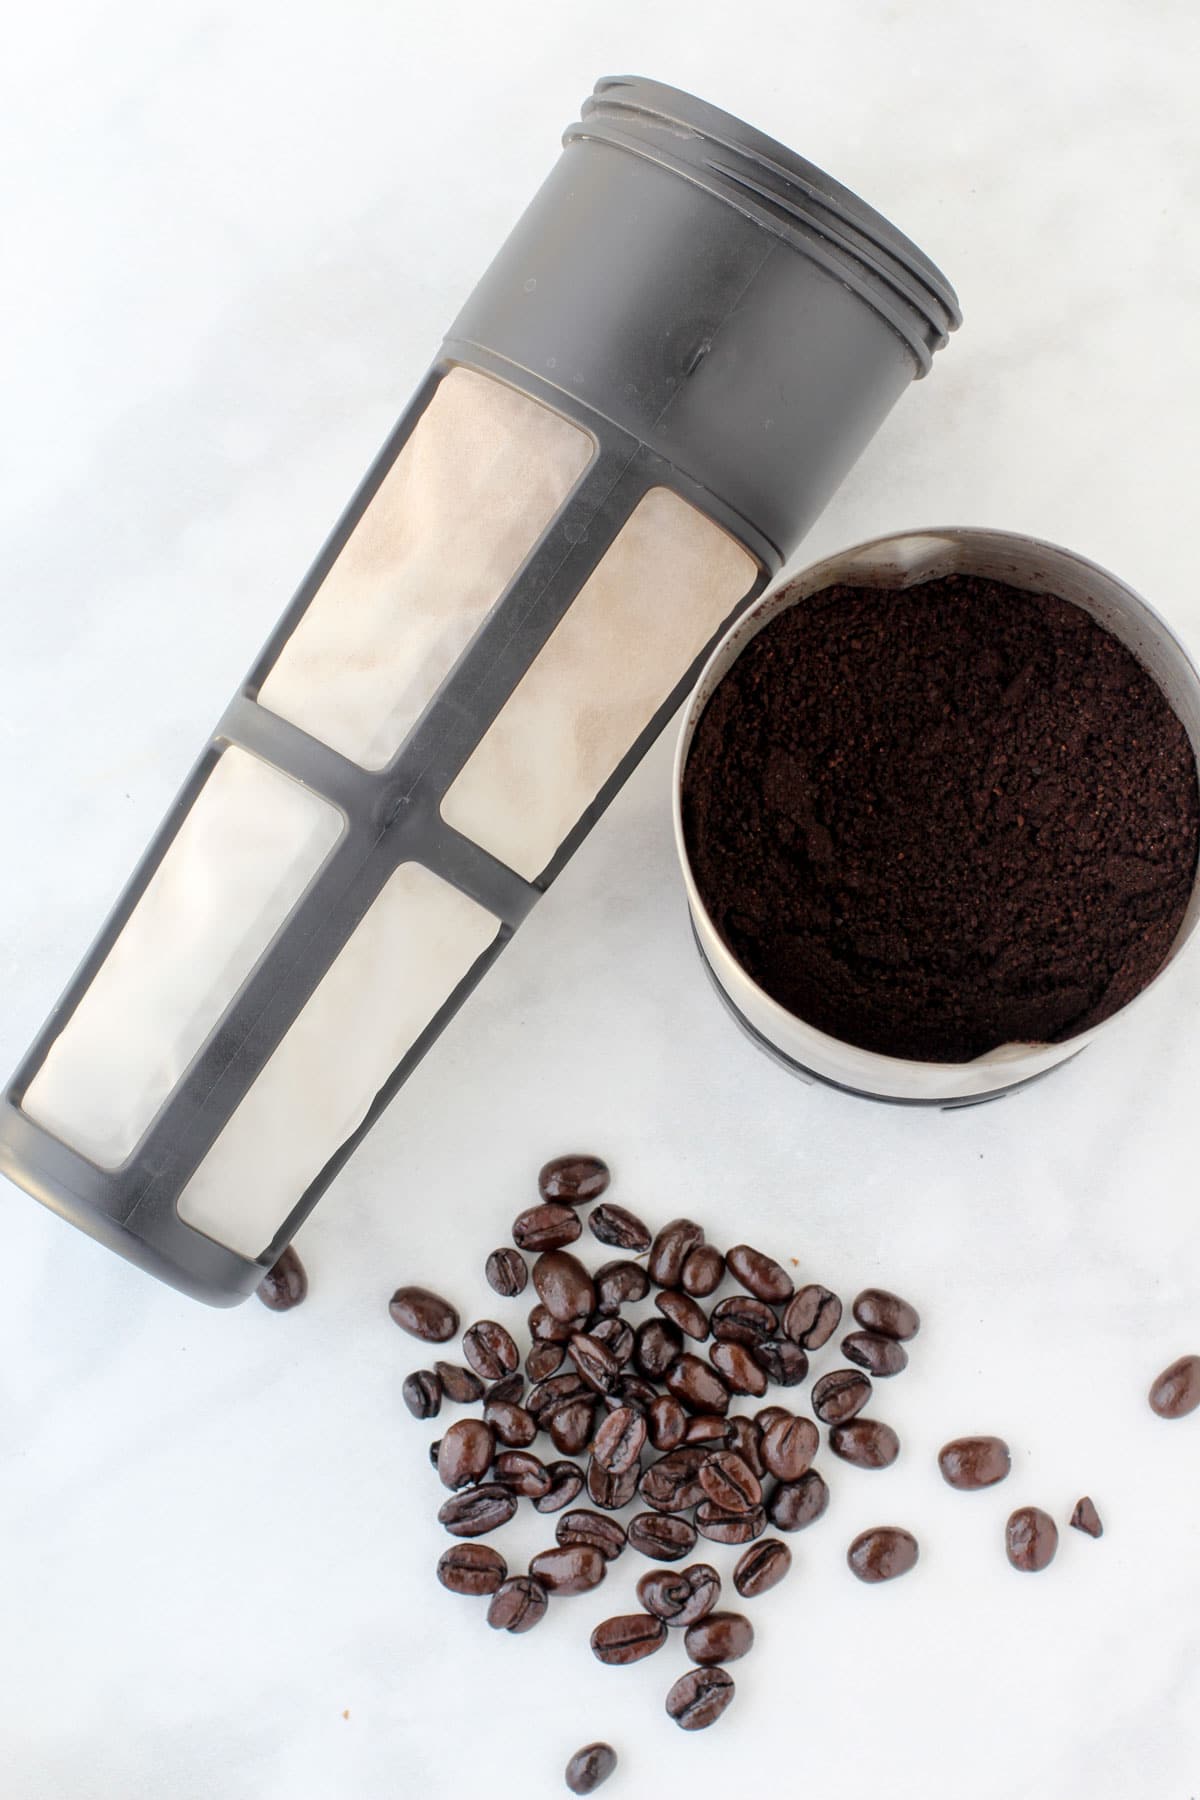
I've been using[easyazon_link identifier="B00VN6LLEY" locale="US" tag="hunghobb07-20"]Trader Joe's dark roast[/easyazon_link]and [easyazon_link identifier="B0018MGTOU" locale="US" tag="hunghobb07-20"]Pete's dark roast decaf[/easyazon_link], but I just ordered two different ones from Thrive Market. My doctor said she would prefer me to drink a limited amount of caffeinated coffee (1 cup specifically) instead of decaf because of the chemicals used in the processing of decaf. I'm not 100% comfortable with that, so I've been doing half-caff.
I started to get freaked out about the chemical thing, so I ordered this coffee which uses swiss water process instead of chemicals to create the decaf. To be 100% honest, I have zero ideas if the swiss water process is any better for you, but in theory the fewer chemicals, the better, which makes me feel better.
Anyway, so all you do is fill up the pitcher with filtered water about ¾ of the way full.

Screw on the filter to the lid. Then, screw on the lid to the pitcher base. Make sure it's on tight then give it a good shake before it goes in the fridge.
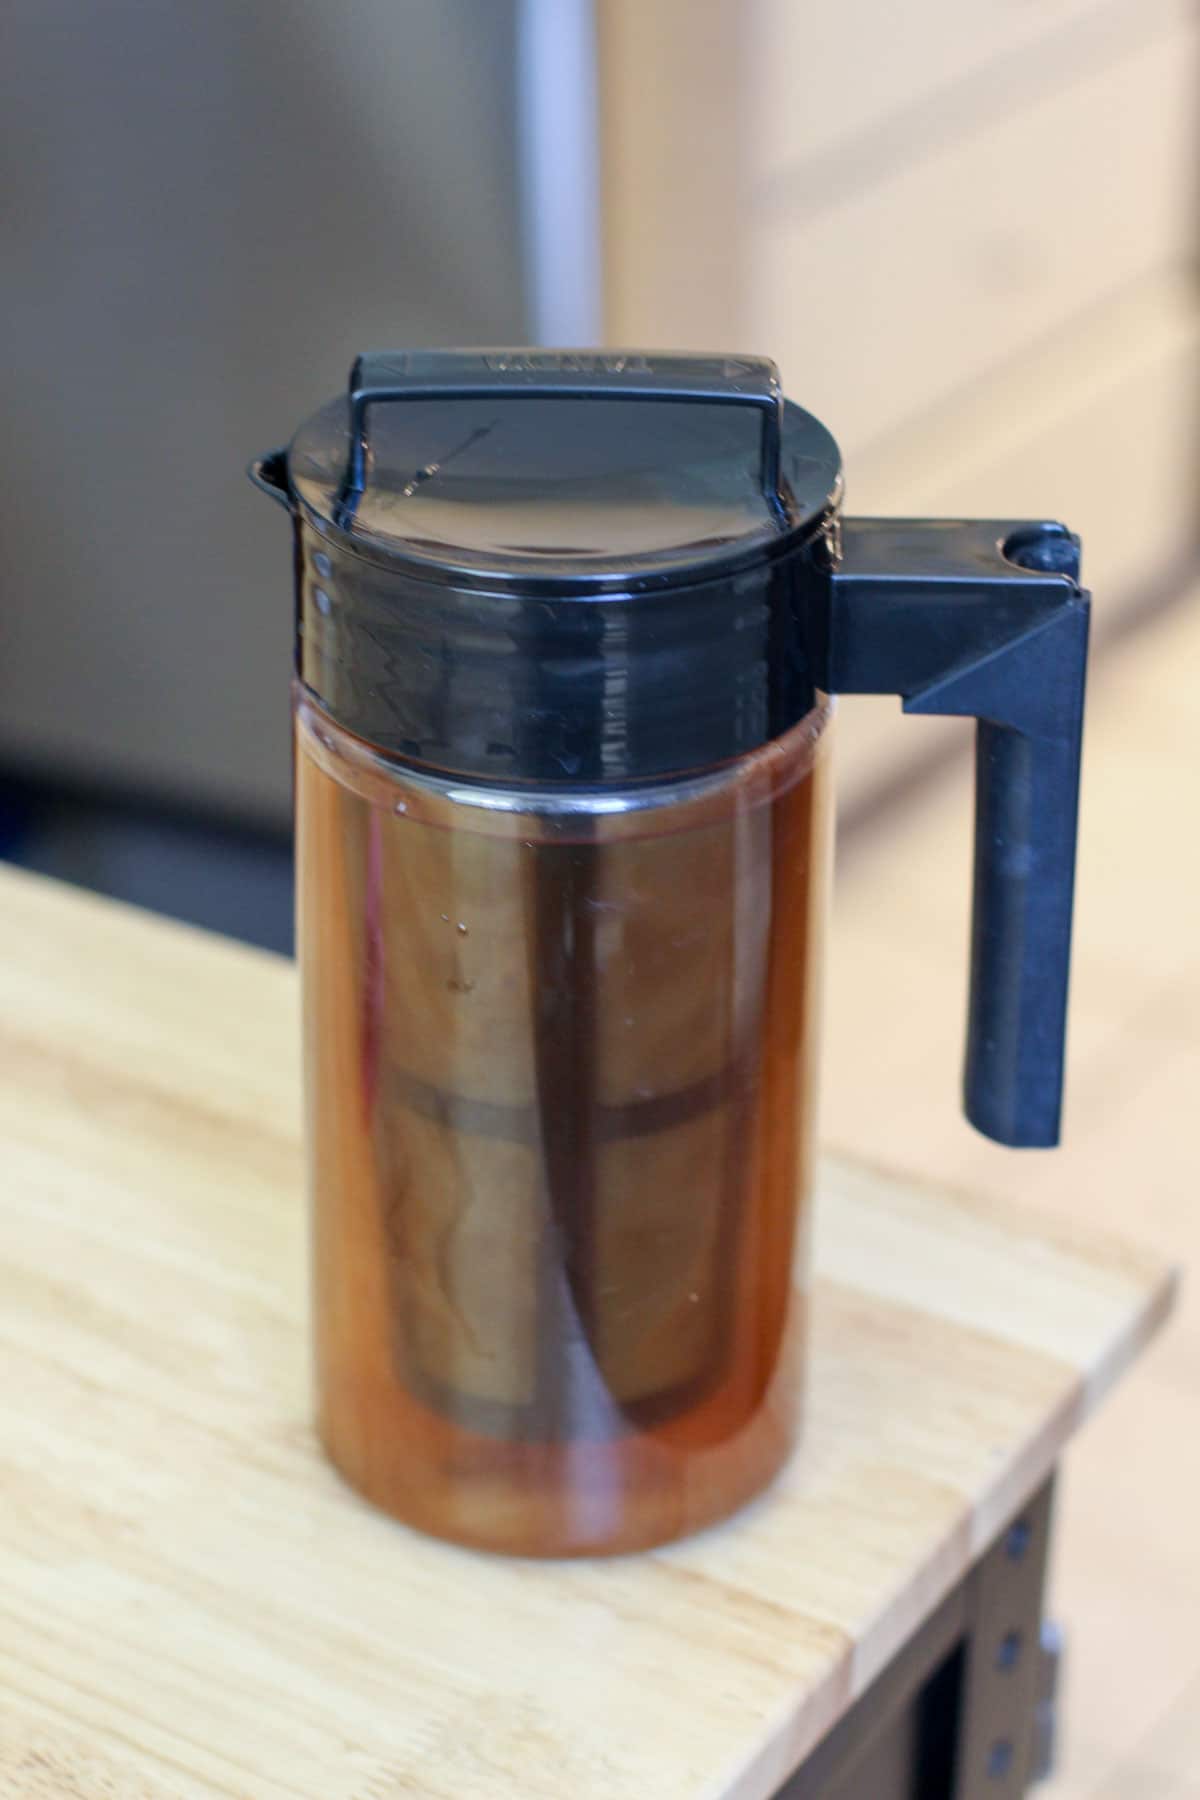
It's ready in about 12-24 hours; I usually leave it for the full 24 hours before I dump the filter, clean it, and let it dry.
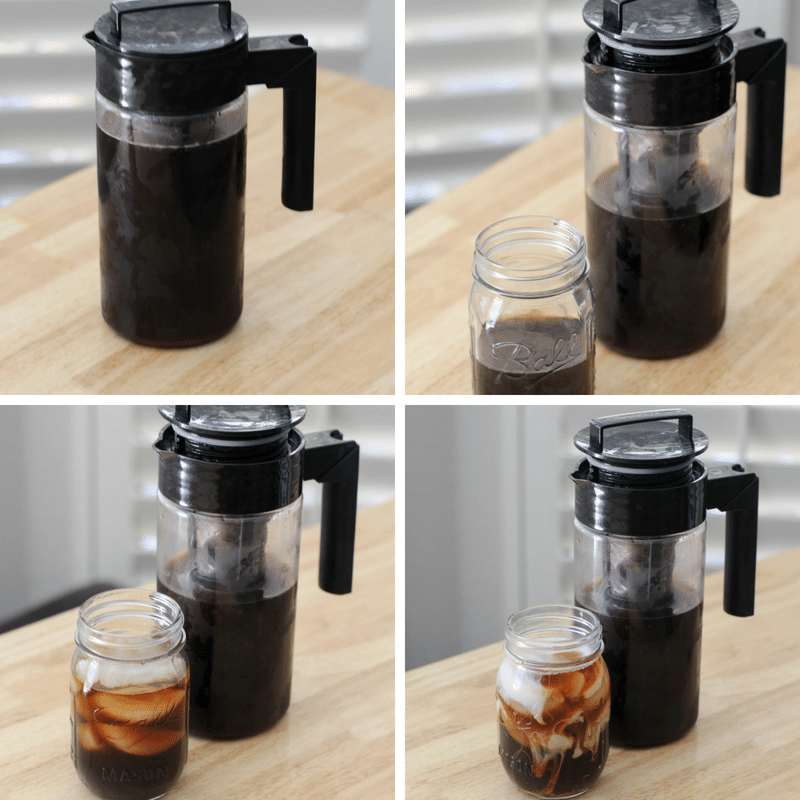
Most mornings I fill a mason jar about ½ of the way full or to the 200ml mark, add ice and dump some unsweetened vanilla almond in to make it complete. That's it! Then, I'm good to go. If I'm taking my coffee on the go, I screw one of [easyazon_link identifier="B074L5FPMZ" locale="US" tag="hunghobb07-20"]these lids[/easyazon_link] on with a straw.
I thought about getting more than one pitcher, but honestly, you don't need to unless you have a ton of people drinking from it. Otherwise, you can always make a pitcher, pour the made cold brew into a large mason jar and get another batch started.
Alright now for the fun part, I'm so excited about this, I'm giving one away! Enter below!
You may also like:
Don't forget to pin this for later and follow @hungryhobby for more healthy recipes, easy workouts, and healthy living tips!


Keegan says
How long can you let cold brew sit in the fridge after it's made and ready? Do you have to drink it within a day?
Kelli Shallal MPH RD says
That is a GREAT question. You know I think it's really a taste thing. I believe but don't quote me on this that the caffeine does not degrade, so as long as it taste's good it's probably good. Its high acidity makes it unlikely to go bad, so as long as you use filtered water your probably fine for quite some time. That being said, it never lasts longer than a week in my house!
Jodi Zagrabelny says
Love cold brew, I do it the old fashioned way and would love to try out the pitcher.
Kelli Shallal MPH RD says
My friend does that! Seems kind of messy ha ha
Mira says
I've been doing research on how to make cold brew since, like you, it can get crazy expensive buying. This looks like a perfect solution!
Kelli Shallal MPH RD says
Ya, I was always so intimidated by it but most Amazon pitchers are cheap and the one I got works really well!
Karly Foret says
Perfect timing for this post! I'm going to purchase this now! lol.
Since hot coffee isn't a big hit for me lately, I've been making brewing coffee it then putting in the freezer with ice for a good hour before drinking it!
Karly Foret says
ok, I wont buy just yet. maybe I can win one! haha!!
Kelli Shallal MPH RD says
LOL this made me laugh! Desperate times and hot temperatures call for desperate measures!
Megan @ Skinny Fitalicious says
I need this! I have the same water bottle as you and love it!
Kelli Shallal MPH RD says
Fair to say that we based an entire new website off the color scheme of our water bottles lmao
Megan says
I would love to try making cold brew! I love my morning coffee and I think I own every other type of coffee maker there is ...aeropress, french press, moka, keurig - I would love to add this to my collection!
Kelli Shallal MPH RD says
Um that is quite the collection! I don't even know what half of those things are!
Kelley Murfin says
I've been making cold brew as part of my weekly meal prep every Sunday, and I bring my breakfasts and lunches to work 4 days of the week -- leaving a fifth day for a fun lunch out with coworkers!
Kelli Shallal MPH RD says
Always got to have at least one fun day!
Jaime says
You're basically my twin right now! I've switched to full decaf because I found caffeine makes my heart palpitations worse. And Starbucks stores don't make their cold brew in decaf. =( I've got a pitcher similar to yours, and I love it! Just this morning I put chocolate milk in my cold brew instead of whole milk and Oh. My. Goodness. This is a game changer!
Sarah @ Bucket List Tummy says
Yesss cold brew is so expensive!!
Stephanie says
This is the second time in a week I’ve heard about this pitcher! Must get it.
Lauren says
Cold brew is my fave! Hot or cold weather, always my go-to. But I agree - I spend way too much on drive-thru brew. Would love to have this!!! Thank you for the chance.
Christina @ montessoriishmom.com says
I make cold brew in my french press and would love to try this to compare!
Laurie Nykaza says
We do make our own coffee everyday to drink it saves us a lot of money. It is expensive to buy 3 drinks for our family every time we go out for coffee drinks.Love to try this too.
Emily @ Pizza & Pull-Ups says
I need this in my life!!!! I love cold brew.
Cynthia C says
I save money by using cash instead of a card. I know it seems old fashioned, but there's something about pulling actual money out of your wallet that makes you think twice about spending it.
Rachel LeGrand says
I always feel like I get grounds in my coffee when I make cold brew on my own, so I'd love to try this! I try to save money by meal prepping on the weekend. I really notice a difference when I make a list to take the store and stick to it and when I scan my pantry/fridge so I don't end up with 5 half-full bags of quinoa.
Kelli Shallal MPH RD says
There are still a few coffee grounds left when you use the pitcher I bought, but it's nothing excessive and they usually end up at the bottom of the pitcher. Very little gets into my coffee itself. You could also use a strainer to pour your coffee in which hopefully filter out any excess grounds.
Jenny Ham says
I stock up on coupons
Serena says
I've been making and experimenting with cold brew for at least three years.
I now use a fine mesh bag with one pound of coffee (Costco) and enough water to make about 76 ounces of coffee (I use a big old plastic ice cream container and fill it mostly full.).
I let it sit for usually about 12 hours. I've done everything from 6-48 hours and can't say I can really tell a difference.
I pull out the bag, squeeze a bit on the bag, not very much. Used to squeeze a lot and had more sludge. I used to filter through a coffee filter. Took too long and decided I wasn't that picky.
I end up with well over a half gallon. I make up about 5 16-ounce coffees for super fast coffee each morning - one a morning. Mix in the milk and date when I'm off artificial sweeteners. Put everything in the refrigerator.
Each morning I blend up the contents of one jar and have a super super cheap frothy coffee.
I've also frozen the jars - don't fill to full. Works great.
The coffee lasts a good two weeks.
Mary Beth Elderton says
Yes to saving money---we make coffee, lunches. smoothies all at home--I cook at home daily. Favorite food-money hack---I do a large budgeted grocery shopping only every two weeks with a quick trip for produce in between. This cuts down on impulse buys and saves over the long term---I sometimes get "ahead" of the budget and have room for extras. Also--Aldi has good prices on grassfed beef.
ELIZABETH C. says
I definately make my own coffee & I bring my lunch to work.... most days of the week !
Calvin says
I been using rebate offers and coupons. I haven't tried cold brew! Awesome. I only spend on what I need.. I.e Food.
heather heather harris says
I love cold brew coffee! I would love to try this pitcher!!
Sarah H says
I need to do this! I just make a pot of coffee and throw it in the fridge but my boyfriend hates it that way!
ellen beck says
My saving money hack is to make ahead freezer meals so I can buy in bulk and have things already prepared.
Susan Gillam says
I make my own coffee cause Starbucks is a rip off.
Kelli Shallal MPH RD says
LOL for real
Bonnie Lee says
My fiancé and I like to roll our change. Every 3 months we deposit it into our savings account. It adds up so much over time and is a great way to bring up our savings.
Brandy Crabtree says
Cold brews are my fave when it's hot outside. I would LOVE to learn how to make my own flavored coffees like you would get at a coffee shop. I work at a restaurant as a bartender so I'm experienced with alcoholic drinks. I should temporarily work at a coffee shop so I can learn. Lol
Emily says
I spend a shameful amount on coffee as well haha
Stephanie G says
I save money by shopping sales, eating in, clipping coupons and searching for best deals through different sites.😁
Nick Nori says
I need something like this to save me time! I like cold coffee and don't have a large coffee maker so I boil my coffee, strain it and put it in mason jars to cool overnight. This seems way more simple!
Brianna Cavins says
Couponing!
Leela says
I found two pennies two days ago 😉
I check sales flyers and coupons every week and compare sales.
Nicole Tingwall says
I drink cold brew year round, so this is perfect! Thanks for the tips!
Jerry Marquardt says
I like the cold brew option most of all options. My favorite hack is to have all cleaning equipment in good maintenance. Nothing worse than break downs!
Julie Hawkins says
I make my own herbal ice tea a ton home instead of buying expensive drinks.
Kayte CookWatts says
My favorite money saving tip is always have your fave foods stocked in your house so you can make a quick meal instead of grabbing take out.
Mal/M says
I have never tried Cold Brewing...I will try it now.
Judy Gregory says
I've been making cold brew since the early 80's. Y'all are late to the party.
Helga says
I brew my own coffee and make my own lunch.
Michelle C says
I use a few websites to check for the best deals on things I need to buy, in addition to eating at home and taking my lunch.
Robin M says
I make my own coffee daily.
Edye says
I bring my own creamer to work to save money!
wen budro says
I try to make coffee and my meals at home. I don't drink soda or energy drinks. These things, alone, save me a lot of money.
Susan Christy says
Stay out of the convenience store!
Angela Hendricks says
I make my own coffee because I'm frugal and refuse to go to a coffee shop and spend the extra money. I also cook dinner in most nights.
Theresa D says
I save money using coupons and phone apps. I would love to try and make my own cold brew coffee it would save me tons of money each week.
Kerry P says
I make my own coffee and take it to work. I also prep a large meal on Sunday to take for the first few days of the week. I buy discounted gift cards, in case I need to eat out during the week.
Lauren says
I make my own cold brew as well.
Ae Minx says
I like to make my own lunch.. and shop sales
Kelly Freeman says
i always use coupons - it saves me at least $20/week
Hesper Fry says
To save money I make my own meals and limit going out to eat to 1 time per week.
Leah Shumack says
Coupons is my best money saving tip. It's like having more money in your pocket when you go to the store!
Sher Kurwa says
Definitely make my own coffee and lunches too!
clynsg says
I frequent estate sales and auctions. It is sometime amazing what you can get cheaply at them--last week I won the bid for a clothes hamper (which retails about $15) for $5, and in addition to the hamper (needed to replace one in my grandson's room that had broken handles), there was about $50 worth of really nice towels in it. I suspect the main reason nobody else bid on it was that the goods were laid out on the lawn and the company had not covered them during a rainstorm, so the towels were soaked. A visit to the washer and dryer at home, and I was also able to replace some quite worn ones in the linen closet!
Kelli Shallal MPH RD says
my mom does that!
Erik VL says
When shopping or booking something online, I always do a search for promo codes first.
Amy Deeter says
Sometimes i will pick up pennies on the street. i save coins and cash out when i get a lot
Kelli Shallal MPH RD says
MY MIL does that! She is a pro at spotting them!
Marissa C says
I use the Ibotta app to help save $!
kathy pease says
I useold newspapers instead of paper towels to wash windows
Kelli Shallal MPH RD says
Wow, I wouldn't have thought that would work! I'm going to try that!
Cassandra D says
I make my own coffee with my own twist to it.
Cliff Plummer says
I bring my own lunch and coffee- hot or cold- to work. It cuts out an added expense!
AEKZ2 says
Yes, I do make my own coffee. I love iced coffee with French vanilla creamer.
LeAnn Harbert says
I always take my lunch and drinks from home.
Carina N says
Love cold brew! Was looking for one of these.
Trisha McKee says
When my daughter was younger, we had a large roll of paper. Throughout the year my daughter would draw on it. We'd use it for wrapping paper. Saves money ANd relatives loved having something she had made.
Kelli Shallal MPH RD says
That is an AMAZING idea! I LOVE that!
Trisha McKee says
Thank you!
Linda Shanahan says
I always take my lunch and drinks from home.It cuts out an added expense!
Michelle says
H, I must read this post snd thought I would ask if, after 6 years, this is still a good product?
Kelli Shallal MPH RD says
Yes!!!! But, I don't use it anymore because I have 3 kids under 5 now. I just buy my iced coffee lol
Michelle says
I can understand that! LOL. It does come up on Amazon and a most popular iced coffee maker.
Thank you for replying